A new dedicated Client Certificates page gives administrators a single, centralized place to upload, view, edit, and delete manual client certificates. This update simplifies certificate lifecycle management across your organization without requiring you to navigate through individual profile configurations.
Procedure: How to Add a Manual Client Certificate
Follow these step-by-step instructions to upload and configure a new manual client certificate in the WizyEMM console:
Navigate to the Certificates Section
On the left-side navigation panel of the WizyEMM console, locate and click on the Configuration dropdown menu, then select Certificates (or click directly on Certificate > Client Certificates).Access the Client Certificates Tab
Click on the Client Certificates tab located along the top menu of the Certificates interface.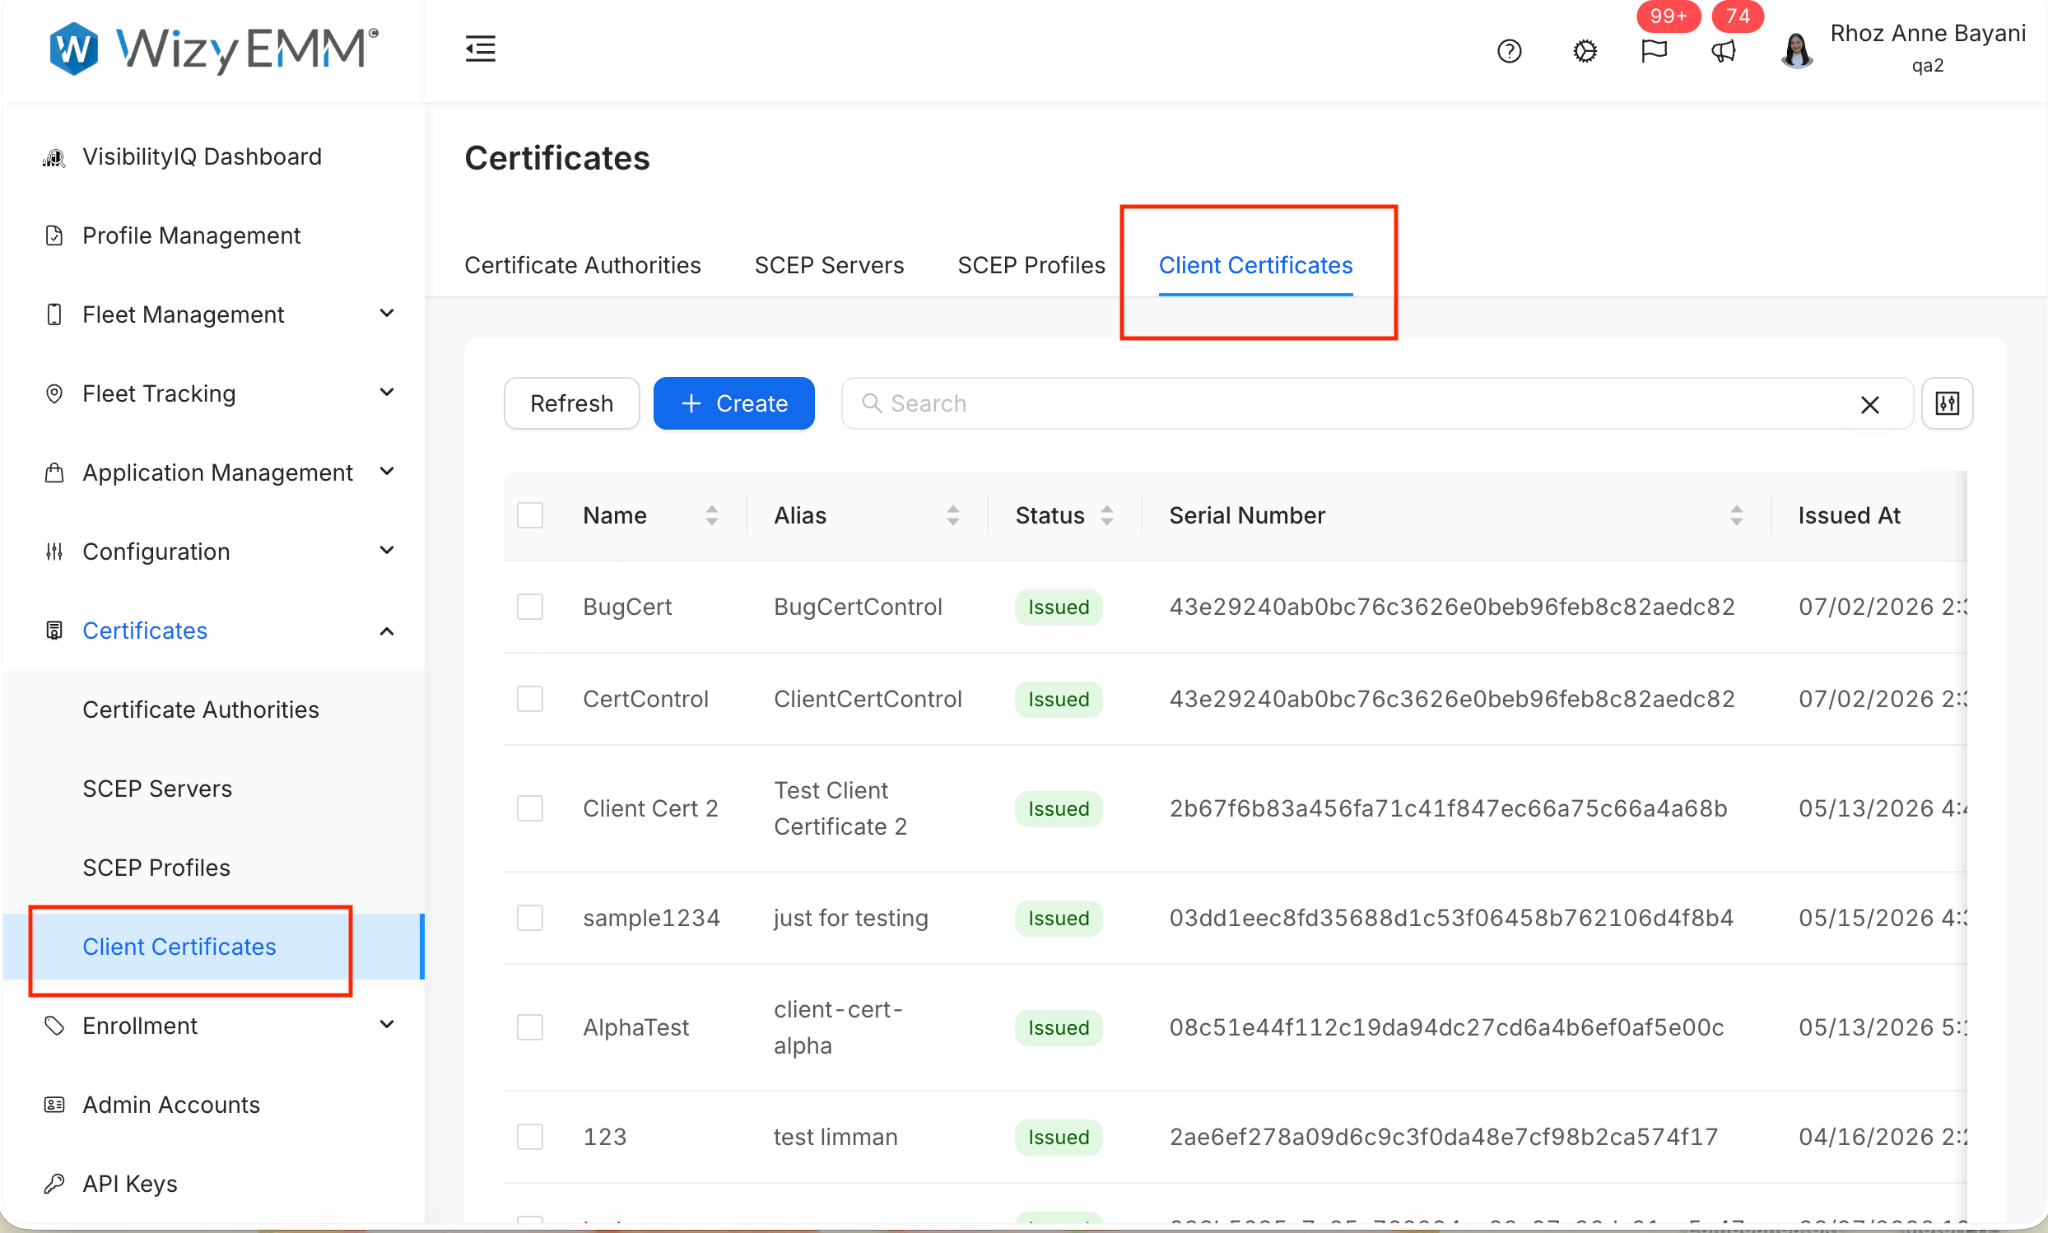
Initiate Certificate Creation
Click the + Create button in the upper-left corner of the workspace.Define the Certificate Properties
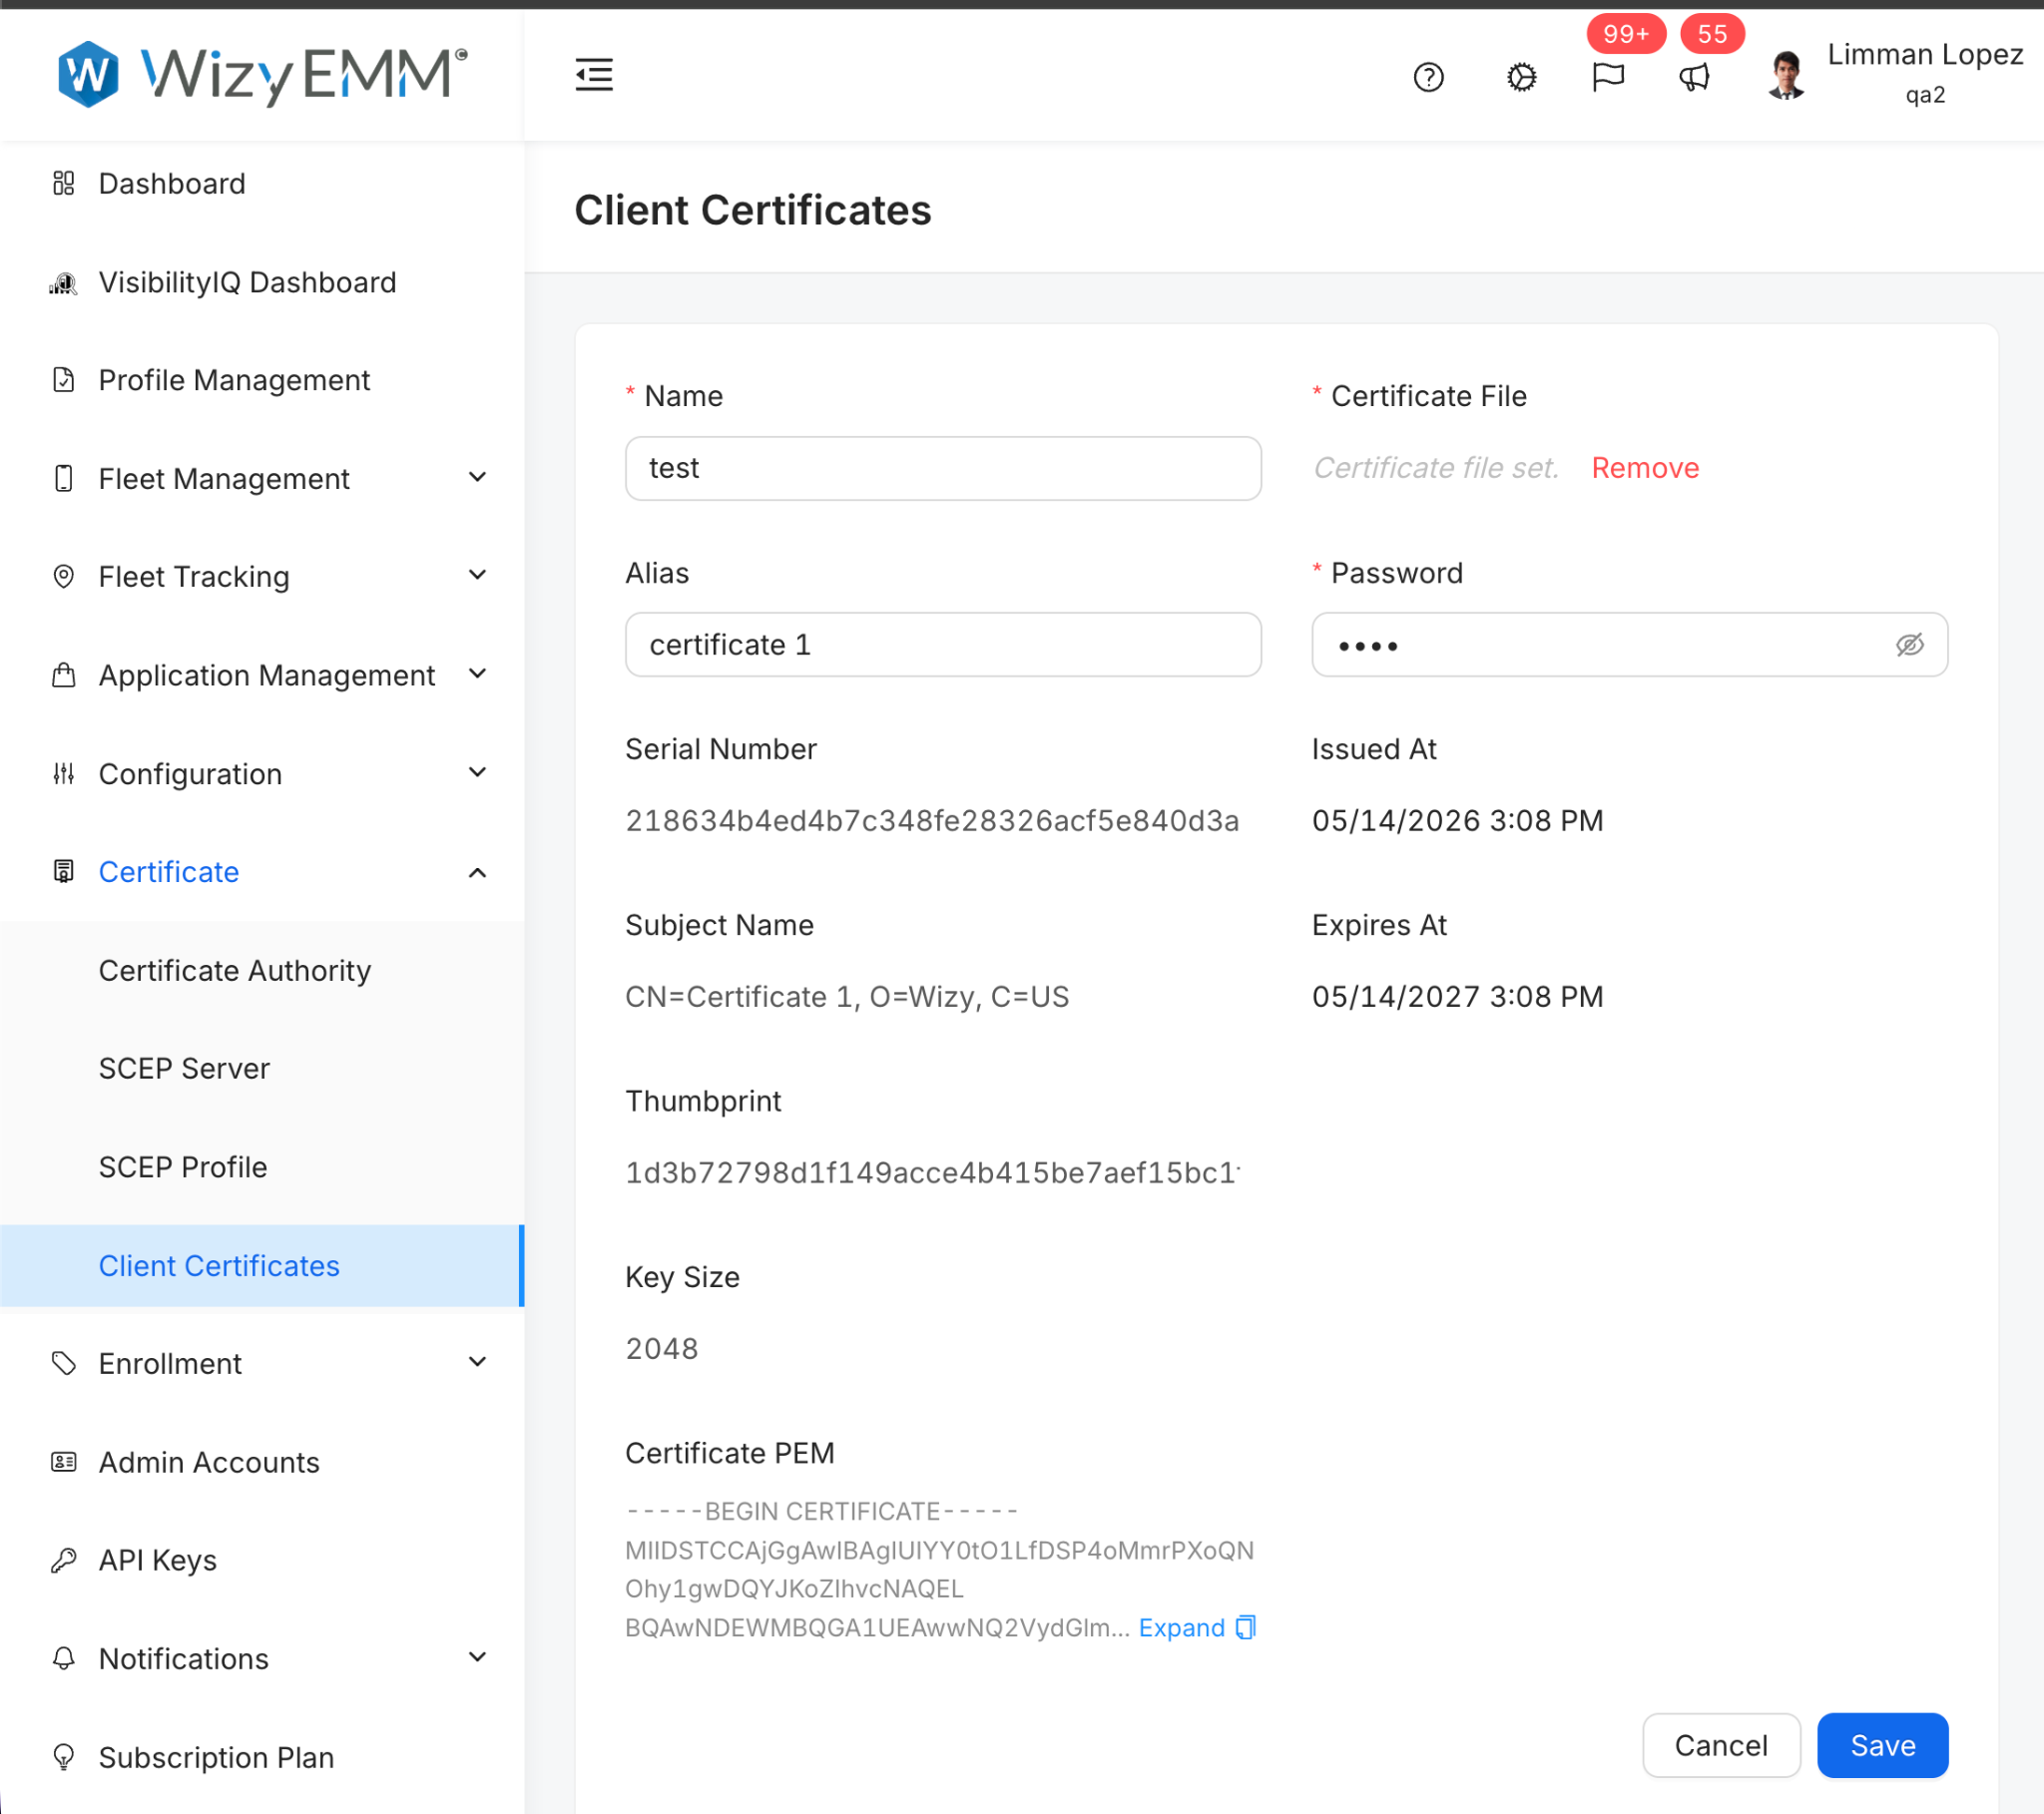
In the form configuration window, fill in the following required fields:Name: Enter a recognizable name for your manual client certificate.
Alias: Input an explicit identifier tag for the certificate asset.
Certificate File: Click the upload area to select and upload your manual client certificate file.
Password: Enter the matching private key or certificate bundle password.
Review Extracted Metadata
Once the certificate file is uploaded and parsed, verify the auto-populated technical context fields, including:Serial Number
Subject Name
Thumbprint
Key Size (e.g., 2048)
Issued At / Expires At timestamps
Certificate PEM string data
Save the Configuration
Click the Save button in the lower-right corner to complete the process. The certificate will now appear in your centralized list with its current status.
Was this article helpful?
That’s Great!
Thank you for your feedback
Sorry! We couldn't be helpful
Thank you for your feedback
Feedback sent
We appreciate your effort and will try to fix the article