This article explains how to define a specific default profile for devices enrolled using automated methods, such as Zero-touch or automated BYOD enrollment. Setting up a default profile ensures that newly enrolled hardware automatically aligns with your organization's management strategy from the initial setup.
Overview of Default Profile Fields
When a device initiates an automated enrollment process, it requires a fallback profile configuration if no explicit profile has been pre-assigned to its serial number. Below are the configurable fields located in the Default Profile Configuration settings inside Profile Management:
Configuration Methods
You can configure default profiles in WizyEMM using either the Global QR Code page or the Profile Management page.
Option 1: Configure under Global QR Code
Log in to your WizyEMM console.
Navigate to the Enrollment tab on the left-side navigation panel.
Select Global QR Code from the submenu options.
Scroll all the way down to the bottom of the page to find the profile assignment section.
Locate the Company-owned device default profile or Personally owned device default profile depending on your deployment scenario.
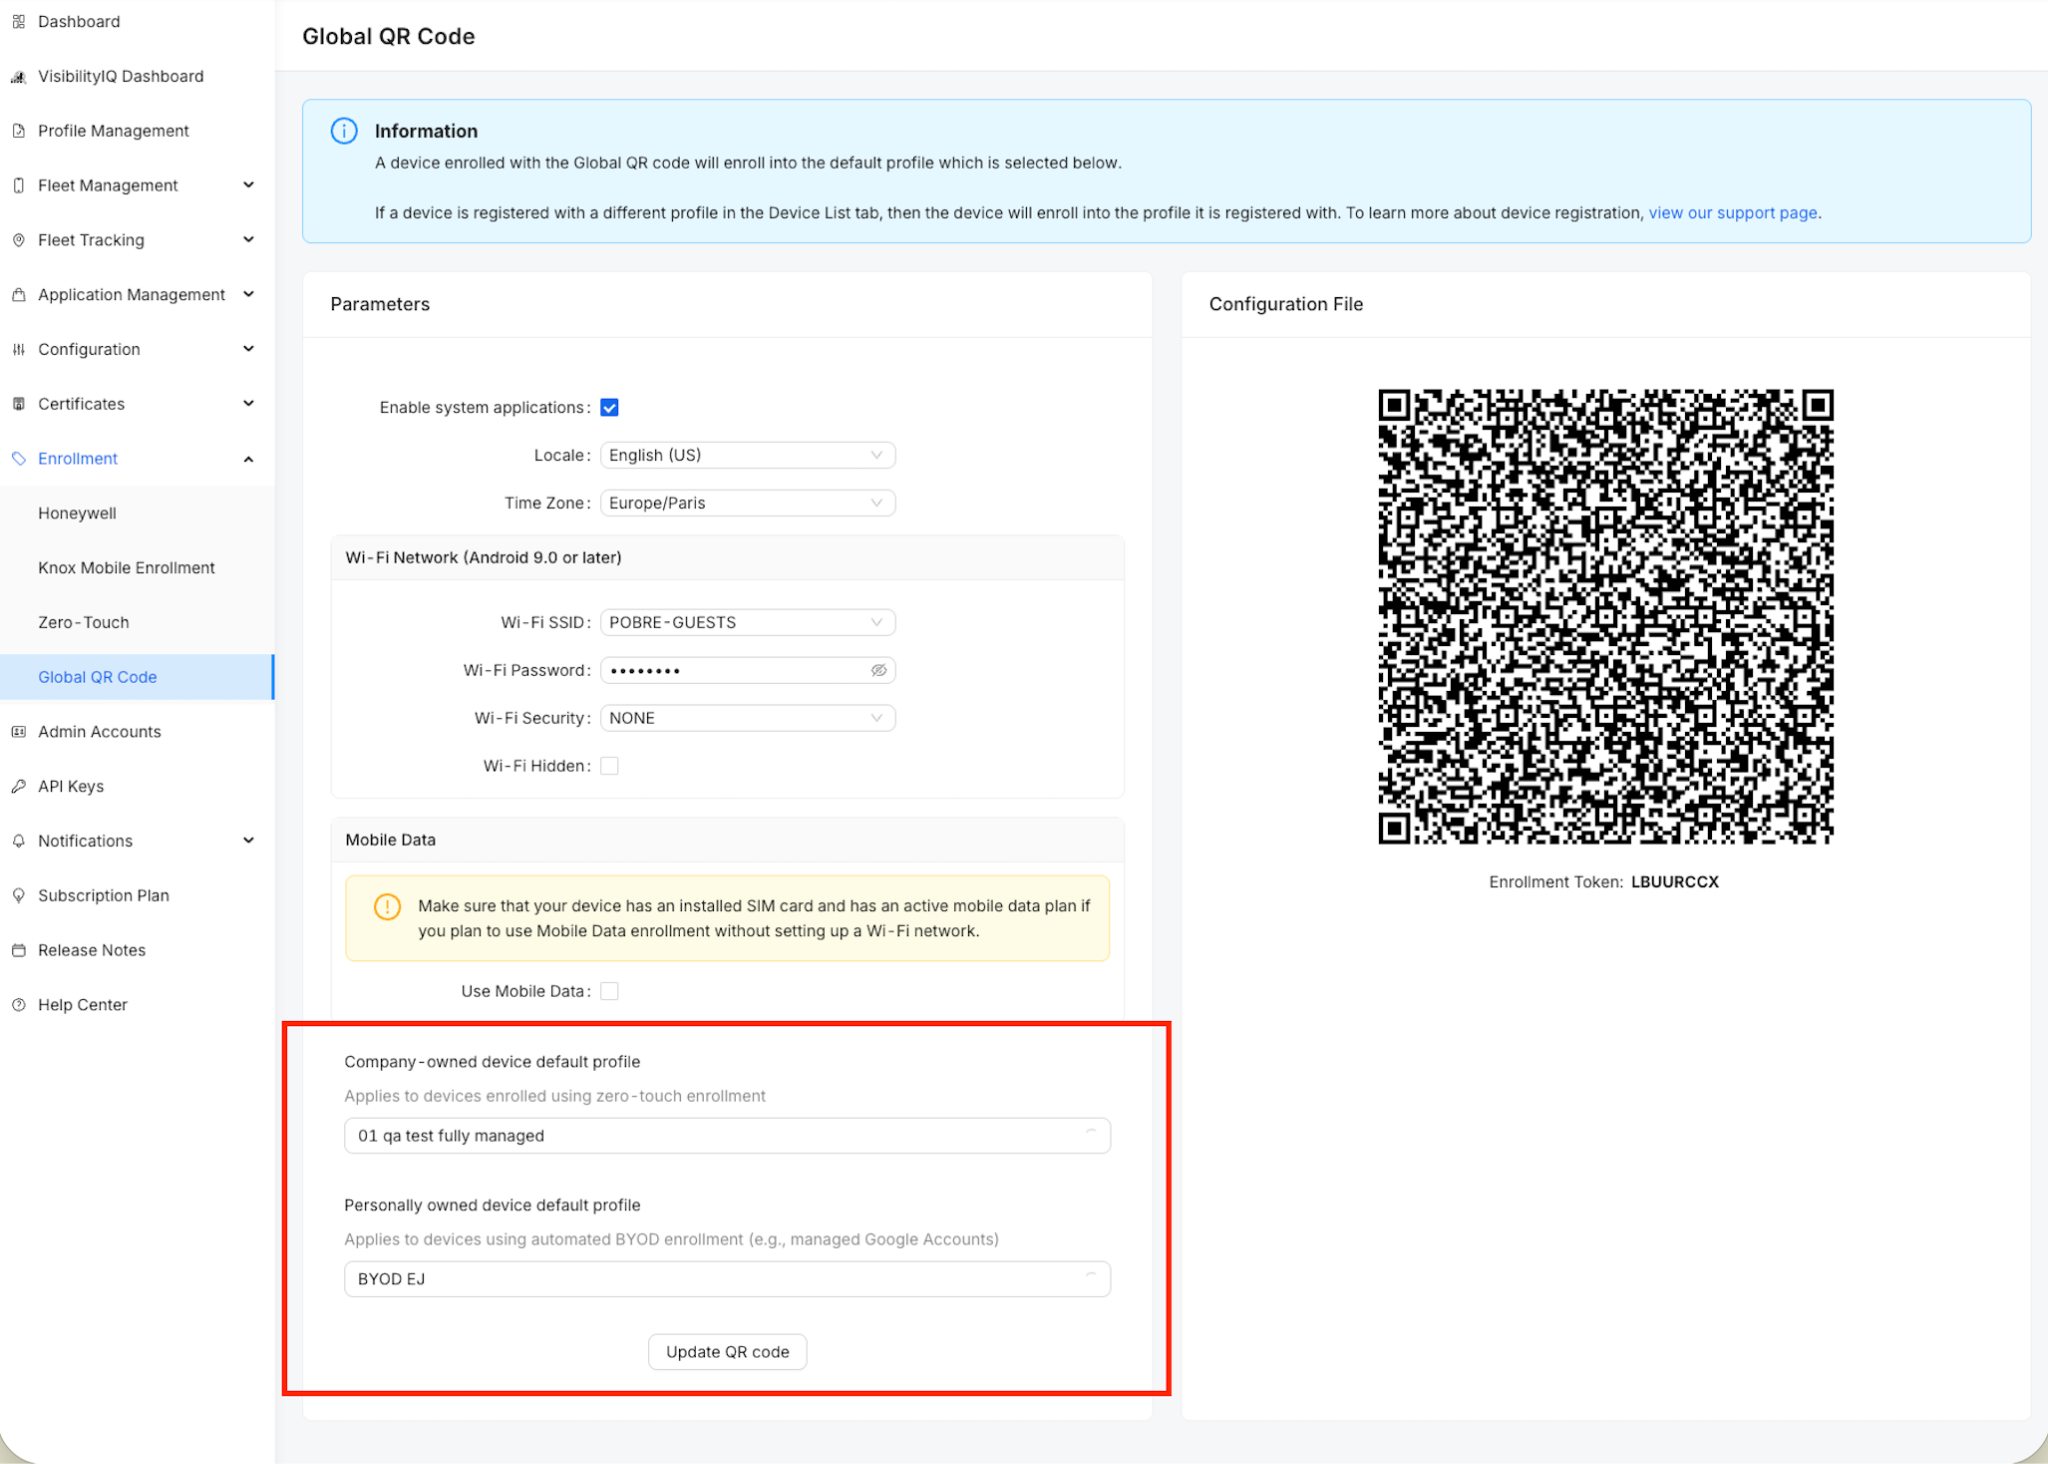
Click the dropdown menu for the respective field and select the desired profile you want to apply by default.
Click the Update QR code button at the bottom to save your changes and finalize the strategy.
Option 2: Configure under Profile Management
Log in to your WizyEMM console.
Navigate to the Profile Management tab on the left-side navigation panel.
Click Default Profiles in the upper-right corner of the page.
In the pop-up modal, select your default fallback profile for Default profile for company owned devices or Default profile for personally owned devices using the respective dropdown menus.
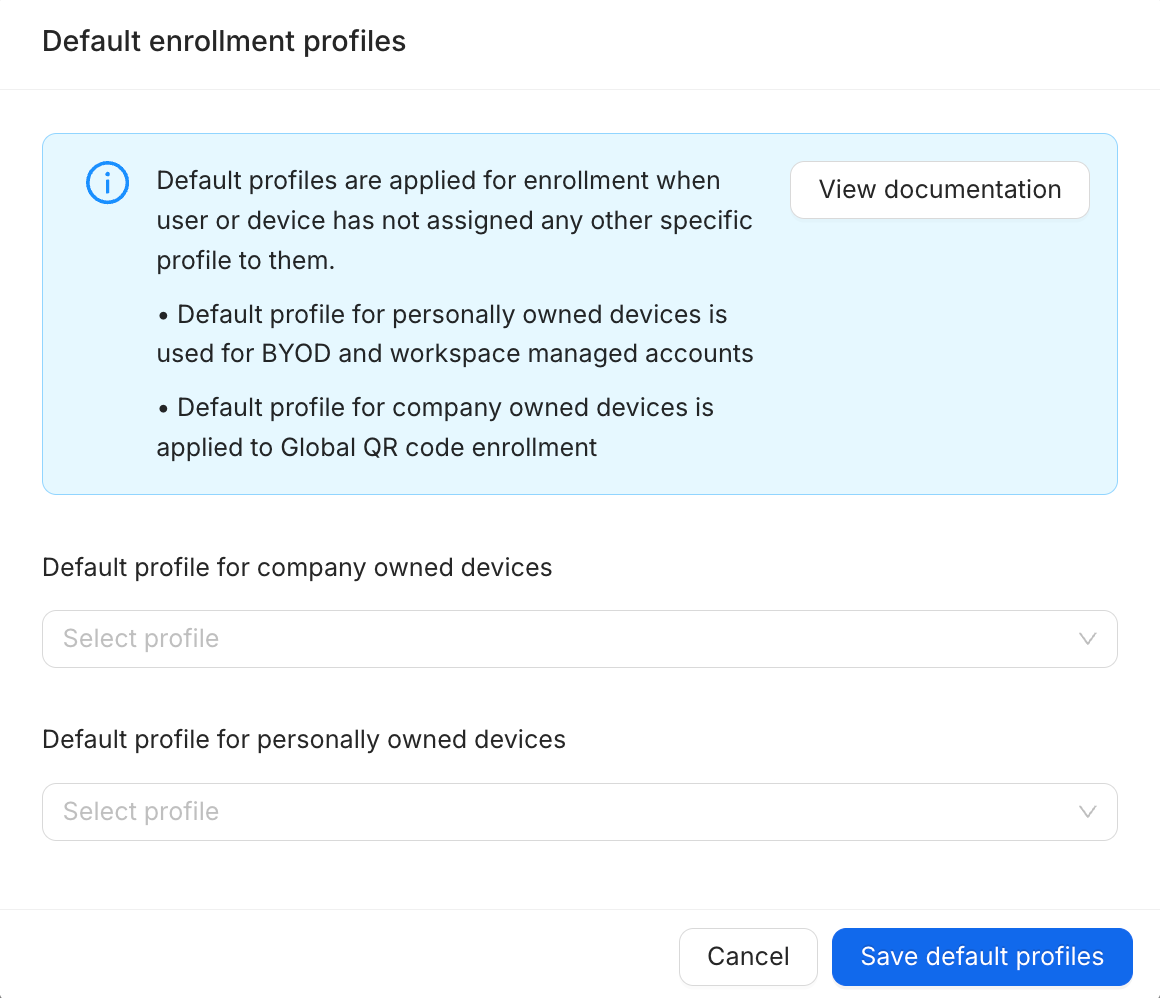
Click Save default profiles to apply and save your changes.
Was this article helpful?
That’s Great!
Thank you for your feedback
Sorry! We couldn't be helpful
Thank you for your feedback
Feedback sent
We appreciate your effort and will try to fix the article